Archive
Geoserver: Using postgresql as a store
We have seen that Shapefiles can be used as data stores for Geoserver. A multitude of other stores exist. An important on is the postgresql store. In this post we will create a database and a table, populate it with some geographical objects and load that data into geoserver.
Assuming that postgres is installed, along with the postgis extension, this powershell script will create a database;
Add-Type -Path "$psscriptroot\Npgsql.dll"

$builder = New-Object Npgsql.NpgsqlConnectionStringBuilder
$builder.Host = "localhost"
$builder.Username = "postgres"
$builder.Password = "some-password"
$connection = New-Object Npgsql.NpgsqlConnection $builder
$connection.Open()

$createdbcommand = $connection.CreateCommand()
$createdbcommand.CommandText = "CREATE DATABASE geoserverdb OWNER geoserver ENCODING 'UTF8' TABLESPACE pg_default"
$createdbcommand.ExecuteNonQuery() | Out-Null

$connection.Close()
This script creates a table:
Add-Type -Path "$psscriptroot\Npgsql.dll"

$builder = New-Object Npgsql.NpgsqlConnectionStringBuilder
$builder.Host = "localhost"
$builder.Username = "postgres"
$builder.Password = "some-password"
$builder.Database = "geoserverdb"
$connection = New-Object Npgsql.NpgsqlConnection $builder
$connection.Open()

$createTableCommand = $connection.CreateCommand()
$createTableCommand.CommandText = @"
CREATE EXTENSION postgis;

CREATE TABLE testtable
(
id bigserial PRIMARY KEY,
name character varying(64),
geoloc geometry
)
WITH (
OIDS=FALSE
);
ALTER TABLE testtable
OWNER TO geoserver;

CREATE INDEX testtable_geometry_index ON testtable USING GIST (geoloc);
"@

$createTableCommand.ExecuteNonQuery() | Out-Null

$connection.Close()
With this in place we can insert some random points using this script:
Add-Type -Path "$psscriptroot\Npgsql.dll"

$builder = New-Object Npgsql.NpgsqlConnectionStringBuilder
$builder.Host = "localhost"
$builder.Username = "geoserver"
$builder.Password = "some-password"
$builder.Database = "geoserverdb"
$connection = New-Object Npgsql.NpgsqlConnection $builder
$connection.Open()

for($i=0; $i -lt 1000; $i++)
{
$lon = Get-Random -Minimum -180 -Maximum 180
$lat = Get-Random -Minimum -90 -Maximum 90
$insertCommand = $connection.CreateCommand()
$insertCommand.CommandText = @"
INSERT INTO testtable(name, geoloc)
VALUES ('name $i', ST_GeomFromGML('<gml:Point xmlns:gml="http://www.opengis.net/gml">
<gml:coordinates decimal="." cs="," ts=" ">$lon,$lat </gml:coordinates>
</gml:Point>', 4326)
);
"@
$insertCommand.ExecuteNonQuery() | Out-Null
}

$connection.Close()
Now, we can go back to geoserver and add a postgis store.

The following parameters are important.

After saving the store geoserver offers the option to publish a layer for it and that is what we want. To make things more interesting we can make a new group which combines this layer with the previously created group for the countries.

There we are. The fancy red dots are the random points from the postgresql database.
Geoserver: Consume WFS service using Carmenta Engine
In the previous post we used the Carmenta WMS layer to consume the layer we published from geoserver. WMS is a standard for loading images. This is simple but sometimes not good enough. Sometimes, we need the actual features from the dataset; can be for further processing or maybe to take advantage of visualization strength on the client side. In any case, this is what WFS promises to solve. Both Carmenta and Geoserver supports WFS as well so lets have a go.
Carmenta provides the OgcWfsDataSet that enables loading from a WFS service. The dataset will then act as a feature producer in the operator chain, just like any other dataset in Carmenta Engine.

We need to specify the url property along with the typeNames.

The typeNames matches the layer name. We cannot use the group layer since that does not expose the WFS interface ?but we have to use one of the concrete layers. In my case I selected the lowest level of detail.
When we run this configuration in Carmenta explorer the result looks like below.

Not much different at the surface but we can use fiddler to take a look under the covers. Here is the list of requests.

And if we select one the details gives that it is not images that are sent over the wire, but structured geographical objects.
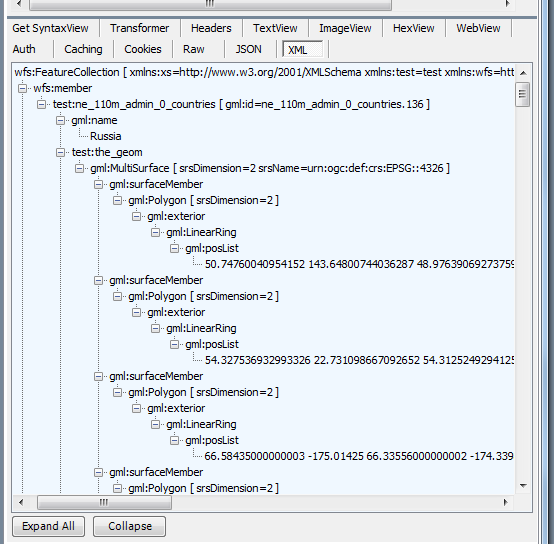
Objects that then can be rendered or analyzed using the tools provided by Carmenta.
Geoserver: Consume WMS layer using Carmenta Engine
In the previous post we created (and published) a layer group for the countries data in the natural earth dataset. Geoserver is now able to expose this layer through a WMS interface and we can use any standard compatible client to load and present the data from this service. In this case we will use Carmenta Engine.
Using Carmenta Studio we can create the following simple configuration:

The OgcWmsLayer component is the Carmenta way of connecting to the geoserver WMS interface. We need to set the url parameter to specify to location of the service (localhost:8080), the workspace (test) and the interface (wms) resulting in http://localhost:8080/geoserver/test/wms. We can also set the actual layer we want to use to avoid loading all layers in the test workspace. A number of different options is available but no more is required.

Loading the configuration into Carmenta explorer reveals a satisfying result.

Geoserver: Adding styles
In the previous post we learnt how to add stores and layers. By default, geoserver, adds a style so that the layer can be displayed. In this post, we will learn how to create a custom style.
By default geoserver supports styles in SLD. SLD is rather verbose and inconvenient to write by hand so geoserver also offers an alternative called CSS which, not surprisingly, is inspired from the web technique with the same name. CSS styling for geoserver comes as a plugin and must be installed separately. The procedure for doing it is straight forward though – just follow the instructions on the linked page.
Click the CCS Styles in the left column to open up the editor. Press create new style and give it a name.

These are the styles created. First for the least level of detail.
[@scale > 20000000] {
label: [name];
label-anchor: 0.5 0.5;
font-family: "Times New Roman";
font-fill: black;
font-style: normal;
font-size: 14;
fill: blue;
}
Second for the middle resolution.
[@scale > 5000000] [@scale < 20000000] {
label: [name];
label-anchor: 0.5 0.5;
font-family: "Times New Roman";
font-fill: black;
font-style: normal;
font-size: 14;
fill: red;
}
And last for the finest level of detail.
[@scale < 5000000] {
label: [NAME];
label-anchor: 0.5 0.5;
font-family: "Times New Roman";
font-fill: black;
font-style: normal;
font-size: 14;
fill: green;
}
We can use to option “change layer association” to set the style for the associated layer. Alternatively, we can open up the layer publishing properties and change it from there (but that is less convenient).

Once done we can combine the three layers into a layer group. By doing this, we get a map that adapts the layer of detail to the current zoom level.


Geoserver: Adding shapefiles stores and layers
I have had the opportunity to have a closer look at Geoserver for the last two days. Geoserver is, citing from geoserver.org:
GeoServer is an open source server for sharing geospatial data
I decided to start out by adding the country dataset from natural earth and to publish it as a wms layer. It is provided for three different levels of details:
Download the data and extract it.

Start geoserver from the start menu.
![]()
Open a browser and surf to http://localhost:8080/geoserver/web if you used the default port. This should bring up the login page.

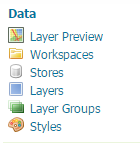
Login as admin/geoserver. All the tools needed for data configuration and visualization definition is available in the tools menu to the left.
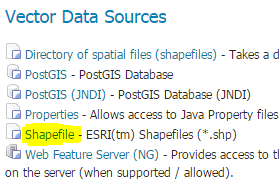
The first thing we need to to is to create a work space. Enter test as name and test as namespace uri. Next, we add on store for each level of detail, which each contains one single shapefile.
The most important parameters are the location and the character encoding (which is windows 1252 for the natural earth dataset according to the documentation).

Once the store is save, geoserver suggests to publish a layer. Press publish to create it. A few things needs to be set for the layers to work properly:
- Declared srs needs to be set to EPSG:4326
- Bounding boxes must be computed (using the Compute from data and Compute from native bounds respectively)
At this point it is possible to go to the layers preview to test the layer.

After adding all three layers the layers list should display something like:

